Getting started with the Eclipse plug-in
In this tutorial you learn about the workflows prerequisites, install Eclipse, a widely used open source Integrated Development Environment (IDE) for developing Java applications, and the Flowable Eclipse Designer, a plug-in to graphically model, test and deploy Business Process Model and Notation (BPMN) processes.
Collibra Platform (Collibra) uses the core engine developed by the Flowable project to run and trigger workflows. A workflow in Collibra is an automated series of actions that produces a specified outcome. At certain points, it requires actions from the Collibra users in the form of tasks. Using Eclipse in conjunction with the Flowable Designer plug-in enables you to create BPMN files that are ready to be deployed in Collibra.
Prerequisites
-
You must have Eclipse Mars or newer to install the Flowable Designer plug-in.
The current version of the Flowable Designer plug-in was released in 2016. It might not be compatible with the latest Eclipse releases. If you encounter issues, try older Eclipse releases, such as 2023-12 or 2023-09. Alternatively, use the new Workflow Designer to create your workflows in a feature-rich web application.
-
Before installing Eclipse, make sure you have installed version 8 or newer of the Java SE Development Kit.
To check if you already have a JDK installed or to get help with the installation, follow the Install Guide instructions for your platform from the Oracle Help Center.
Install Eclipse IDE
Skip this step if you already have Eclipse installed and proceed with the Flowable plug-in installation.
Eclipse provides the environment to accommodate the Flowable plug-in.
- Go to the Eclipse Installer download page.
- Download the installer corresponding to your operating system.
- Run the downloaded installer:
- Windows:
- Accept the security warning if any.
- macOs and Linux:
- Extract the downloaded archive.
- Run the installer.
- Windows:
- Select the desired package. We are using Eclipse IDE for Java Developers for this tutorial as it provides the basic required functionality.
If you already have or if you need another package, see the Compare Eclipse Packages page to ensure your package includes Java Development Tools.
- Accept or change the default installation location.
- Review and accept the license agreements.
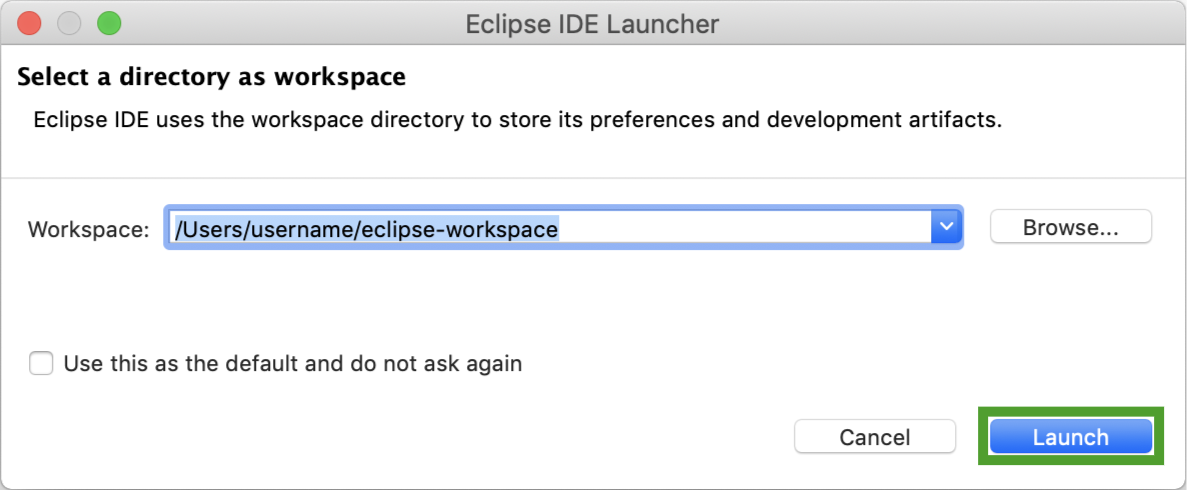
- Launch Eclipse IDE.
- When prompted or set a custom folder, click Launch to accept the default workspace, a folder where your projects are stored.
For additional installation instructions, see the Steps to Install Eclipse.
Eclipse IDE interface
The first time you start Eclipse, you are presented with a welcome screen containing shortcuts to various resources. Clear the Always show Welcome at start up check box if you don't require this screen every time you start Eclipse.

To access the main interface, click Workbench. The workbench is composed of several views which are arranged based on the selected perspective. The views are windows containing one or more tabs. A perspective is a predefined layout of a set of views with specific tabs. You can rearrange the views by dragging them to the desired position, minimize or maximize them. To go back to the initial layout, select Window → Perspective → Reset Perspective...
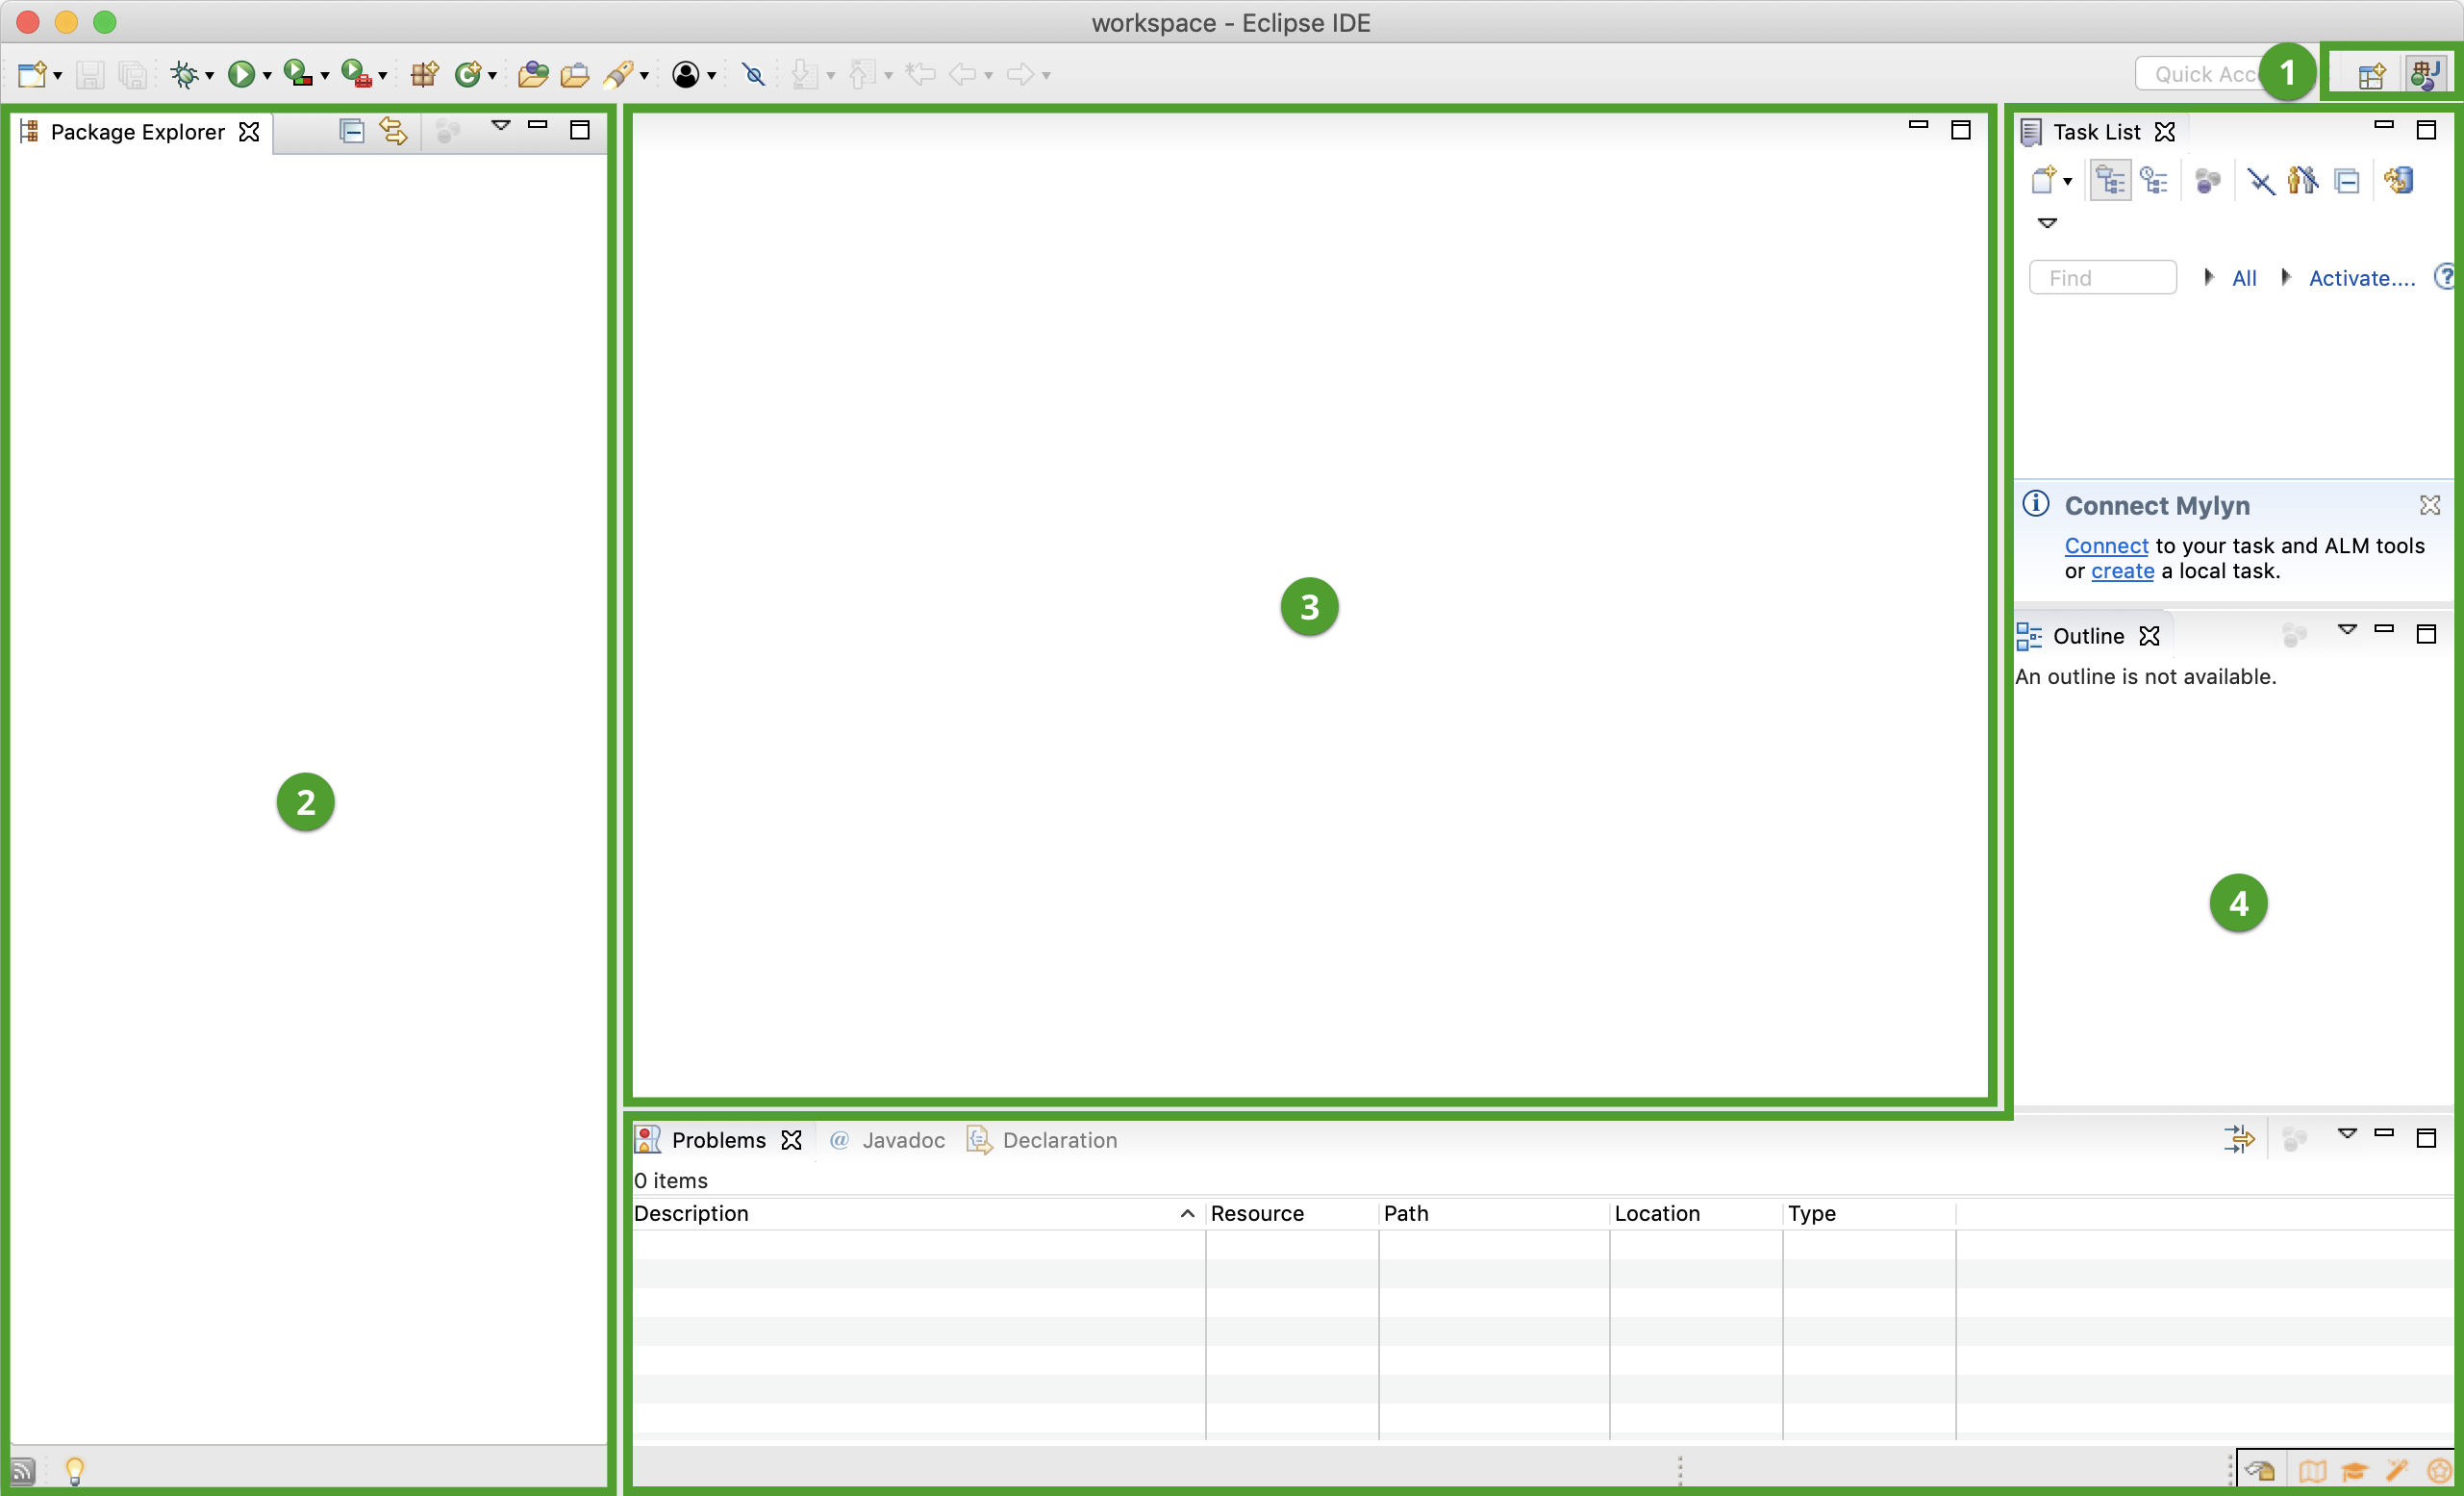
|
Element |
Name |
Description |
|---|---|---|
|
1 |
Perspective Selector |
A perspective explorer and the most recently used perspectives. |
|
2 |
Package Explorer |
A tree list display of files and folders associated with the current project. |
|
3 |
Shared Area |
A tabbed space containing either a visual or textual representation of the selected file or files. |
|
4 |
Contextual Views |
Project related tasks, the outline of a currently open structured file and other views. The placement might differ depending on the selected perspective. |
Install the Flowable plug-in
The Flowable Eclipse Designer provides a list of diagram elements and a drag-and-drop method for developing workflows within Eclipse IDE. The resulting files are fully compatible with Collibra.
To install the Flowable plug-in in Eclipse:
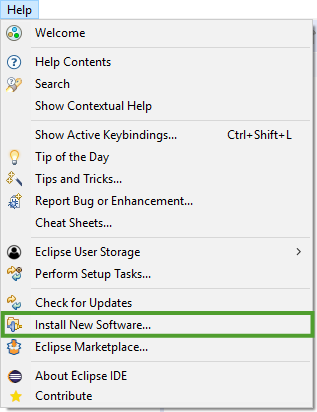
- In the menu bar, click Help → Install New Software....
- In the Available Software window, click Add.
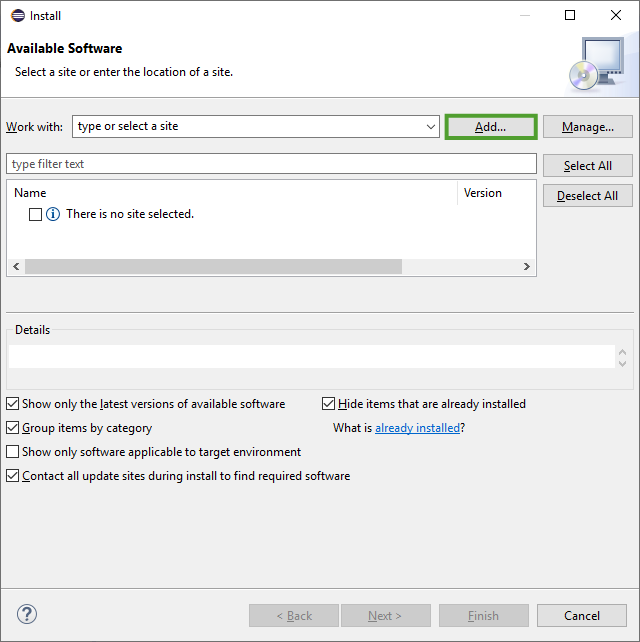
- In the Add Repository window:
- Enter a Name, for example Flowable BPMN 2.0 designer.
- Enter the Location: https://www.flowable.org/designer/update/.
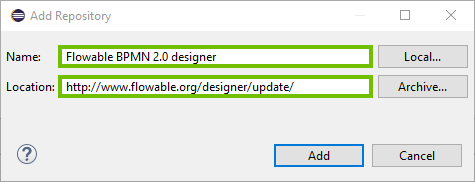
- Click Add to close the Add Repository window.
- In the Available Software window, select the Flowable BPMN Designer check box.
- Leave the other check boxes as they are and click Next.
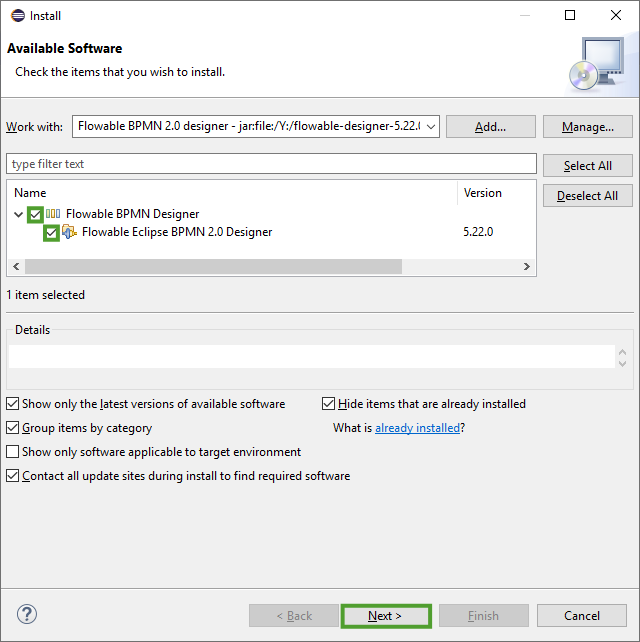
- Review the installation details and click Next.
- Review, accept the license agreements, and click Finish.
- If you are prompted with a security warning, click Install anyway.

- Click Restart Now to finish the installation.
For more installation instructions, see the Flowable documentation.
If the repository location is unreachable, you can try using https://www.flowable.com/open-source/designer/update/ or download the plug-in from the Flowable GitHub repository and install it as an archive.
Create a Flowable project
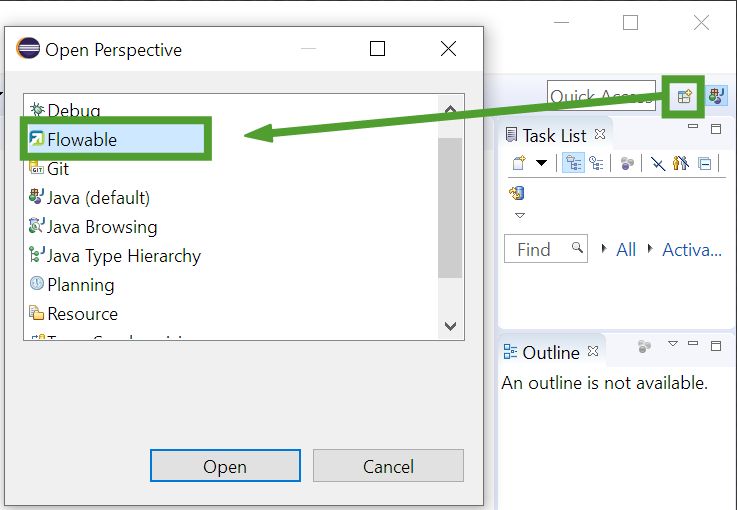
When Eclipse is restarted after the installation, switch to the Flowable perspective to optimize the workbench for designing diagrams:
- Click the Open Perspective icon
 .
.If the Open Perspective icon is not visible, right click on an empty area of the toolbar and select Restore Hidden Toolbar Entries or access the perspectives via the menu: Window → Perspective → Open Perspective → Other.
- In the Open Perspective window, select Flowable and click Open.
- In the Project Explorer window, switch to the Flowable Explorer tab if not already there.

Create a new Flowable project:
- In the menu bar, select File → New → Other.
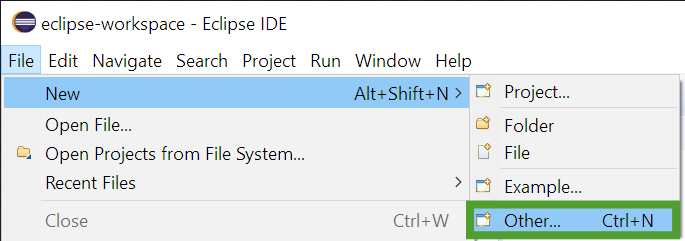
- Select Flowable → Flowable Project and click Next.
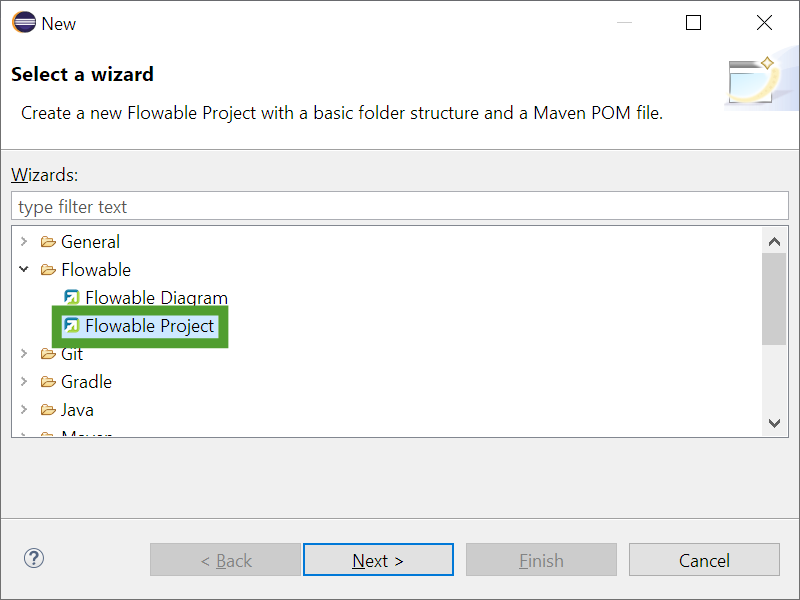
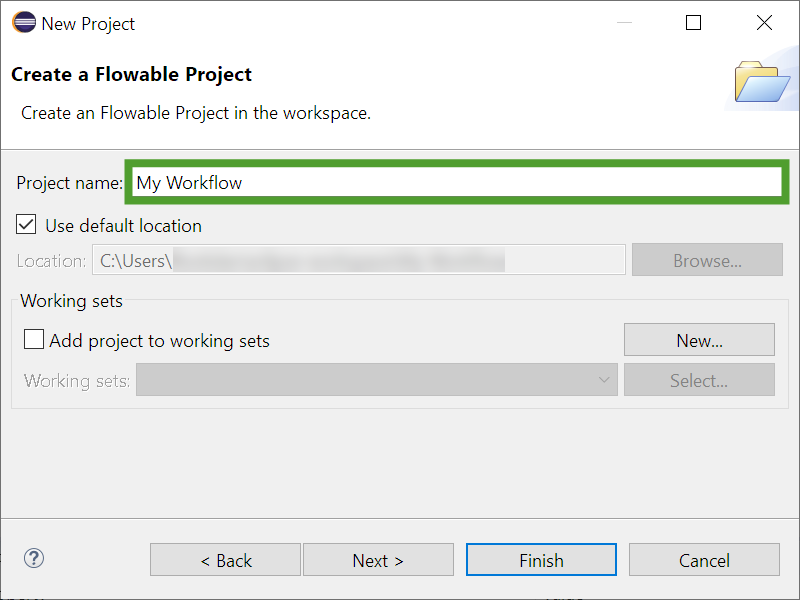
- Enter a name for the project and click Finish. We are using My Workflow in this example.
The Flowable Explorer in the is populated with the project files.
![]()
Create a Flowable diagram
- In the Flowable Explorer tab, select the project and go to src → main → resources → diagrams.
- In the Flowable Explorer tab, right click and select New → Other.
- Select Flowable → Flowable Diagram and click Next.
- Enter a name for the diagram file and click Finish.
The shared area displays the empty diagram and a Palette.
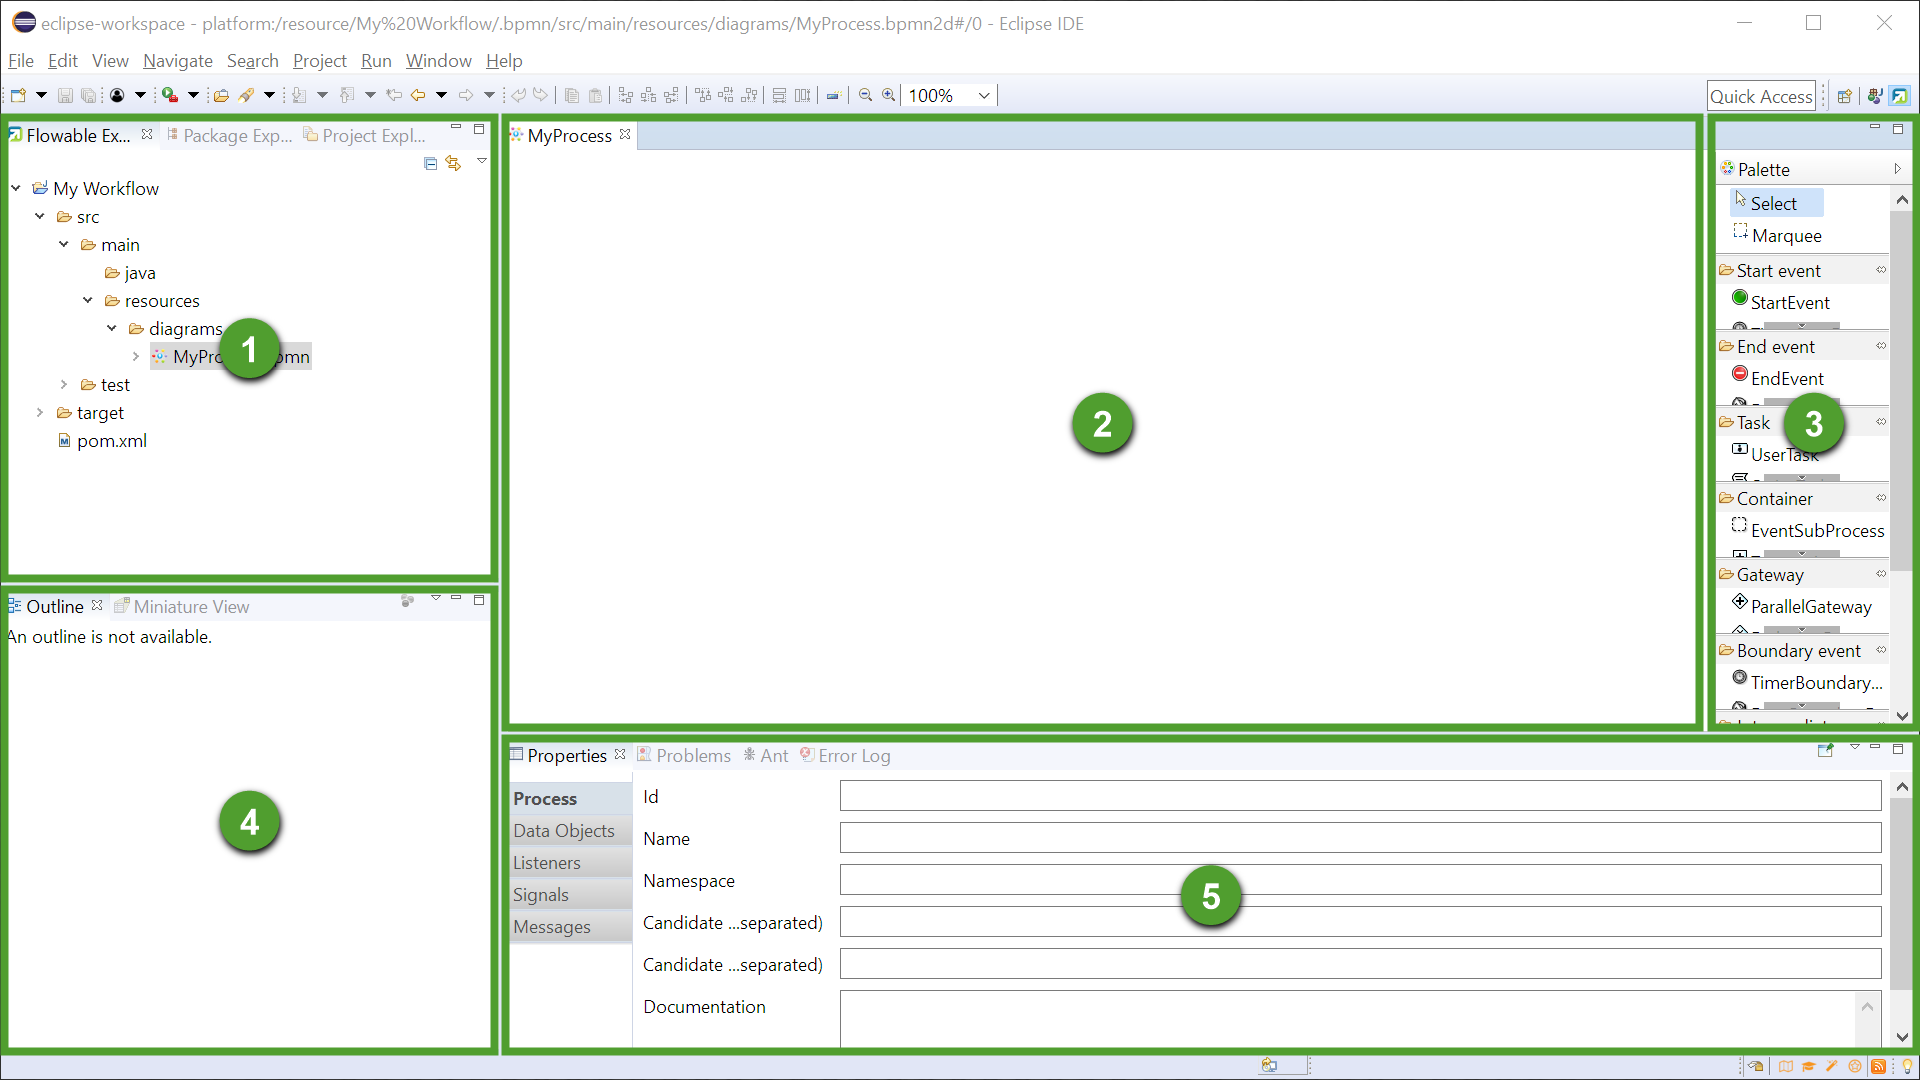
|
Element |
Name |
Description |
|---|---|---|
|
1 |
Flowable Explorer |
A tree list display of files and folders associated with the current project. |
|
2 |
Shared Area - Diagram |
When a diagram is selected the left part is displaying the visual representation of the diagram. |
|
3 |
Shared Area - Palette |
When a diagram is selected the right part is displaying a list of diagram tools and components. |
|
4 |
Outline |
The outline of a selected structured file and its elements. |
|
5 |
Properties |
The property fields of the selected diagram component. |
Next steps
You have created your first Collibra workflow project and diagram.
The next tutorial shows you how to create a simple workflow: Workflows “Hello World!”.
Additional resources
- Read the Getting started with workflows Collibra Administration Guide article.
- Consult the Flowable user guide.