Collibra CLI (Deprecated)

The Collibra Command Line Interface was a set of tools aimed at Collibra developers. It helped manage workflow and REST API projects. It also helped you develop more efficiently on a daily basis, by showcasing best practices, allowing you to upload a complete workflow to your development environment.
Install Collibra CLI (Deprecated)
Prerequisites
- Java 8
- Collibra version 5.7
The officially supported Collibra version is 5.7. Other versions might lead to unexpected behavior.
Windows installation
- Ensure you have set the
java_homevariable. - Download the Collibra CLI ZIP file.
- Extract the content in a folder of your choosing, for example
C:\Users\<username>\My Applications\CLI. -
Add the path to the Collibra CLI bin folder to the system environment Path variable.
C:\Users\<username>\My Applications\CLI\collibra-cli-boot-<version>\bin
macOS installation
- Download the Collibra CLI ZIP file.
- Extract the content in a folder of your choosing, for example in the Applications folder.
- Open the Terminal application.
- Run the following command:
sudo nano /etc/paths. - Add the path to the Collibra CLI bin folder.
/Users/<username>/Applications/collibra-cli-boot-<version>/bin
Linux installation
- Download the Collibra CLI ZIP file.
- Extract the content in a folder of your choosing, for example in the Applications folder.
-
Open a terminal:
-
For Bash shell:
- Edit
~/.bashrcusing vi for example. -
Add
PATH=<your_folder>/collibra-cli-boot-<version>/bin:$PATH
export PATH
Where
<your_folder>is the path the to the folder you extracted the content in. - Save the file.
- Restart your terminal application.
- Edit
-
For C shell:
- Edit ~/.bashrc using vi for example.
-
Add
PATH=<your_folder>/collibra-cli-boot-<version>/bin:$PATH
export PATH
Where
is the path the to the folder you extracted the content in. - Save the file.
- Restart your terminal application.
-
If you get any errors, see the troubleshooting guide.
Update Collibra CLI
To update Collibra Command Line Interface to a new version, replace the collibra-cli folder with the updated one.
Start the application
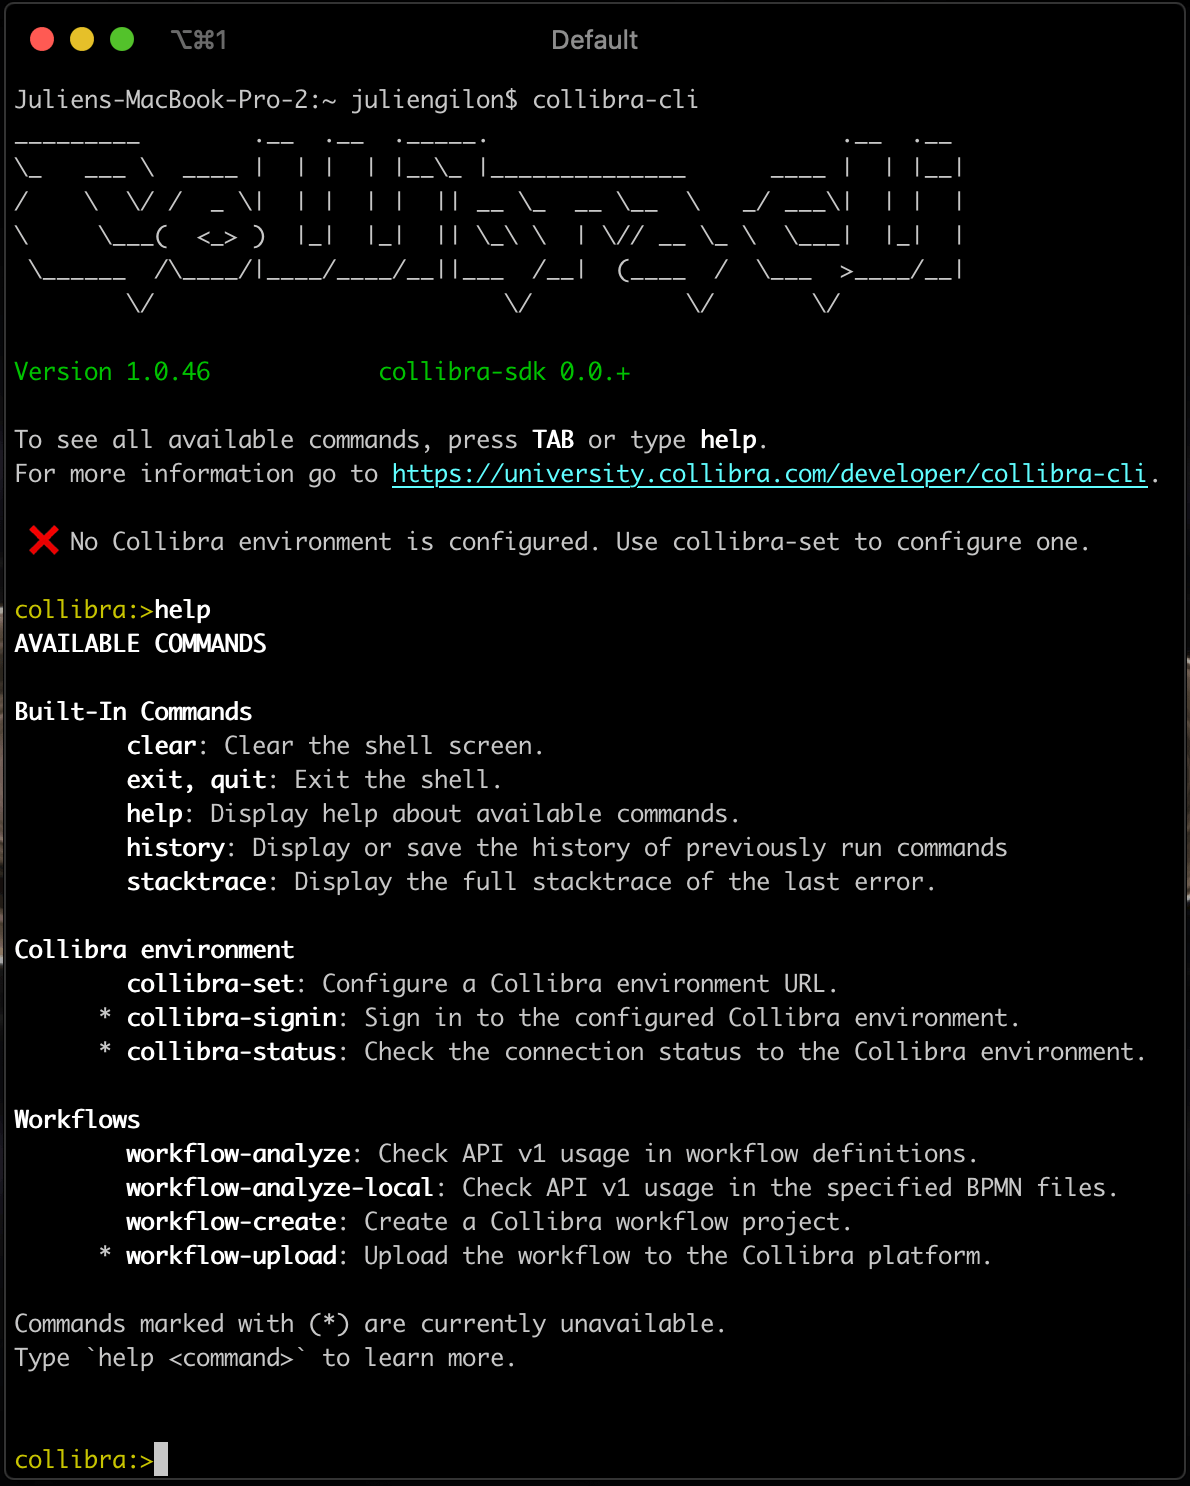
Open your terminal application, for example Command Prompt on Windows or Terminal on macOs.
Type collibra-cli and press the enter key.
Basic commands
See all available commands
The most basic command is help. It displays all the available commands.
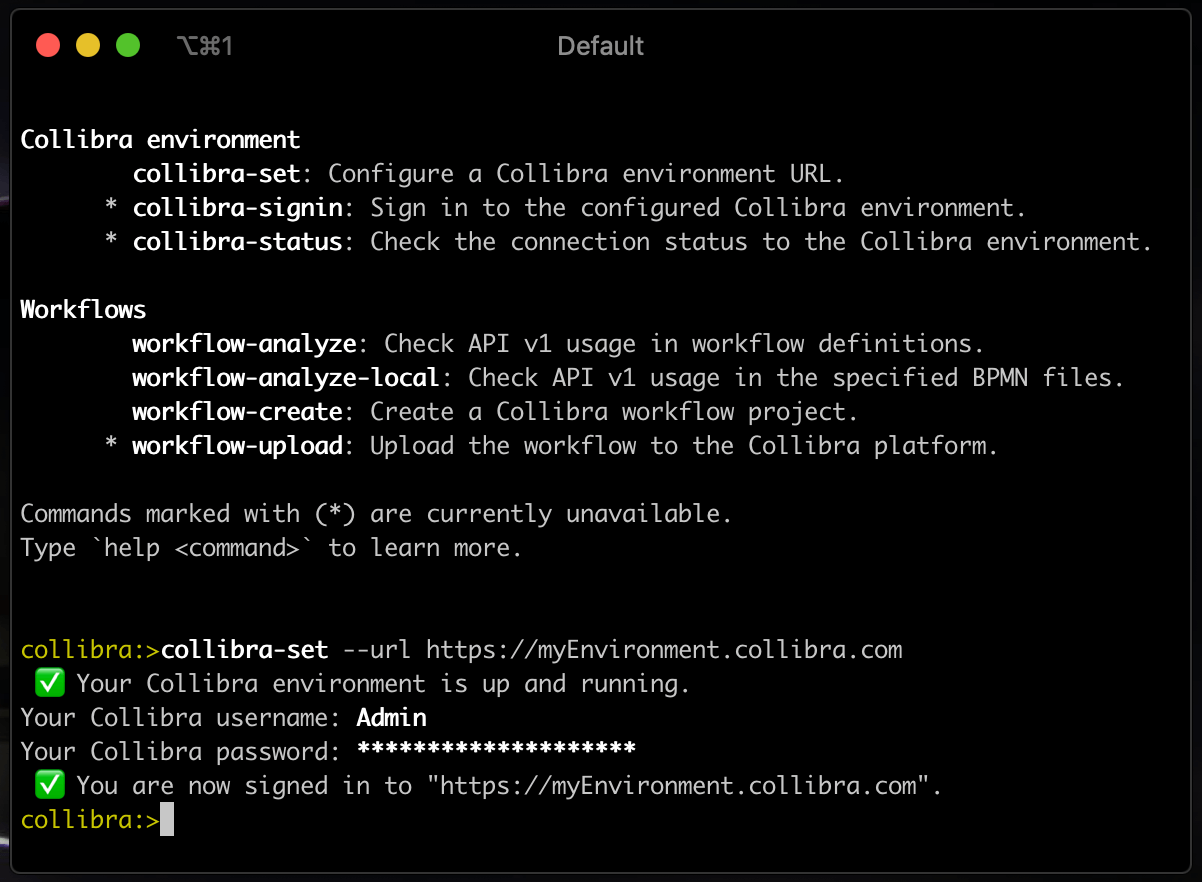
Connect to a Collibra environment
You can cycle through the available commands by pressing the tab key.
- Press the
tabkey repeatedly until you havecollibra-setselected such as in the following image:
- Press
enterto confirm your selection. - Press
tabto see the available parameters:-urland--url.A one dash prefix indicates a shortened version of the parameter while a double dash prefix indicates the long version.
- Enter the base URL of your Collibra environment and confirm by pressing the
enterkey. - Follow the instructions to sign-in.
You have configured Collibra CLI and are ready to create a new workflow project or analyze the usage of API v1 in existing workflows.