User tasks in workflows
In this tutorial you learn how to create and configure a workflow user task, give it a name and a description, assign it to a user, and add form fields to create a dialog box. You then deploy and run the workflow containing the task to see the results in Collibra Data Intelligence Cloud(Collibra).
Prerequisites
- Eclipse IDE.
- Flowable Eclipse Designer plugin.
- Access to a Collibra environment as a user with the Sysadmin global role or a global role that has at least the Workflow Administration global permission.
- Access to the Collibra Console for troubleshooting.
For more installation details and to get familiar with the Eclipse IDE interface, see Getting Started with workflows.
Create a user task
Open Eclipse IDE and
- Create a new Flowable project and diagram.
- Add a pool and configure its properties.
- Add a start event and an end event.
If you have followed the Hello World! tutorial, you should already have a diagram containing a start event, and an end event. If you don't want your Hello World! workflow to be replaced by the new workflow, make a copy of the diagram and change the process ID of the pool.
For more information on how to create a Flowable project and diagram, see the Getting started with workflows and the Hello World! tutorials.
To create a user task from the Palette:
From the Task section of the Palette, drag a UserTask to the pool.
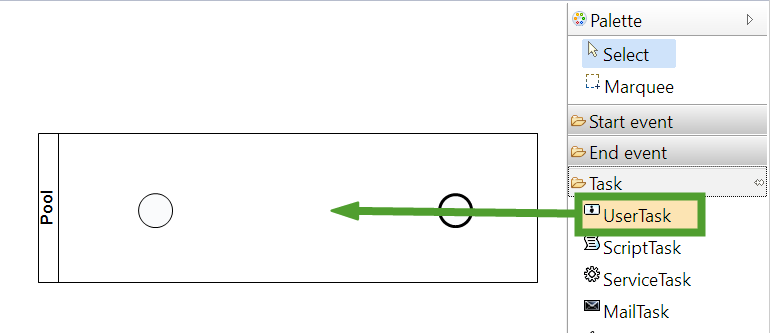
Connect the start event to the user task:
Hover the pointer over the start event and drag the Connection icon over the user task.

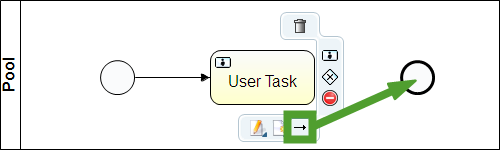
Connect the user task to the end event:
Hover the pointer over the user task and drag the Connection icon over the end event.
To create a user task from the start event:
Hover the pointer over the start event and click the UserTask icon.
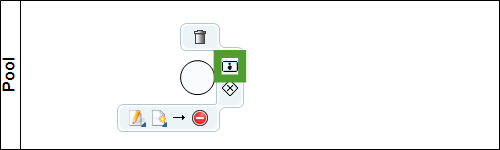
A user task is added to the pool and a connection created between the start event and the user task.
Connect the user task to the end event:
Hover the pointer over the user task and drag the Connection icon over the end event.
Configure the user task
- Select the user task.
- In the Properties view, select the General section.
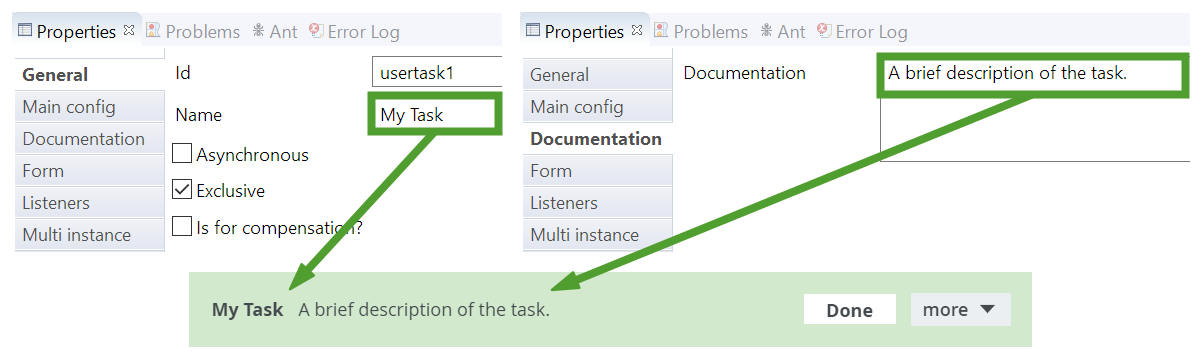
- In the Name field, enter a title for the task. We are using My Task in this example.
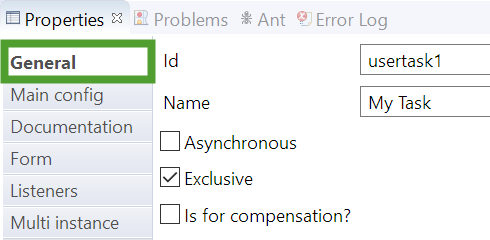
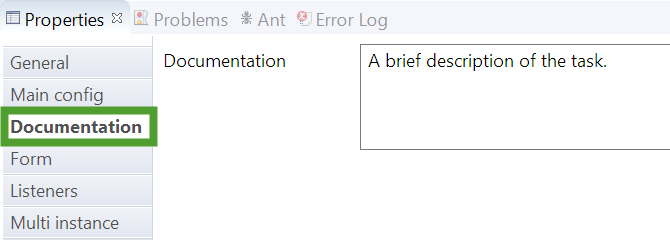
- In the Properties view, select the Documentation section.
- In the Documentation field, enter a description for the task. We are using A brief description of the task. in this example.
The task properties will be reflected in Collibrawhen the task is active:
Assign a user to the task
You need to assign the user task to a user. A candidate user is a user who can perform a workflow task. You can specify candidate users by using candidate user expressions.
We recommend to enclose all user expressions in curly brackets.
|
Expression |
Description |
Example |
|---|---|---|
|
{user(<userName>)} |
The task is assigned to the user having the specified user name. |
{user(Admin)} |
|
{role(<roleName>)} |
The task is assigned to the users having the specified role. |
{role(Catalog)} |
|
{group(<groupName>)} |
The task is assigned to the users belonging to the specified group. |
{group(Data Custodians)} |
To learn more about candidate user expressions, read the Candidate user expressions Collibra Administration Guide section.
While developing a workflow, you should assign yourself to the tasks you are creating. The real user assignments should be completed towards the end of the testing process.
We are assigning the task to the same user who starts the workflow.
To define the user who starts the workflow:
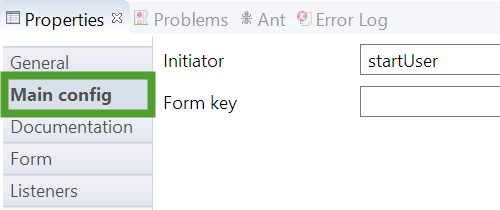
- In the shared area, select the start event.
- In the Properties view, select the Main config section.
- In the Initiator field, enter a name for the variable that defines the user who starts the workflow. We are using startUser in this example.
The value of the variable becomes the username of that user.
- Select the user task.
- In the Properties view, select the Main config section.
- In the Candidate users field enter {user(${startUser})}.
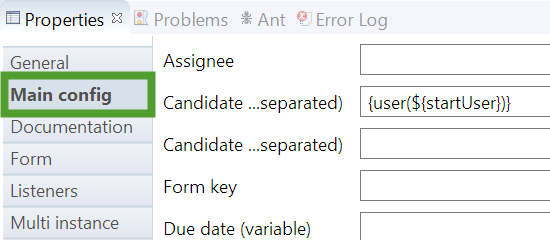
This assigns the task to the user who started the workflow defined by the variable
startUser. The variable is called by enclosing it inside an expression:${}. The value of the variable is then assigned to theuser()object.
Add form fields to the task
As is, the user task only contains the name, a description and a user assignation. Use form fields to create a dialog box and to provide and request more information. Some of the available form fields are:
|
Type |
Usage, Configuration and Example |
|||||||||||||
|---|---|---|---|---|---|---|---|---|---|---|---|---|---|---|
| string |
|
|||||||||||||
| plainText |
|
|||||||||||||
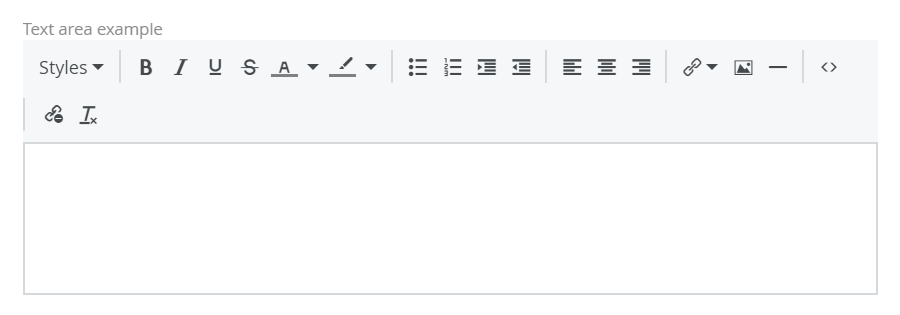
| textarea |
|
|||||||||||||
| long |
|
|||||||||||||
| boolean |
|
|||||||||||||
| datetime |
|
|||||||||||||
| checkbox |
|
|||||||||||||
| radiobox |
|
|||||||||||||
| fileUpload |
|
|||||||||||||
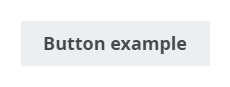
| button |
|
|||||||||||||


For a full list of available options, see the Form property types Collibra Administration Guide section.
To add a simple form field to the task:
- Select the user task.
- In the Properties view, select the Form section.
- Click New.

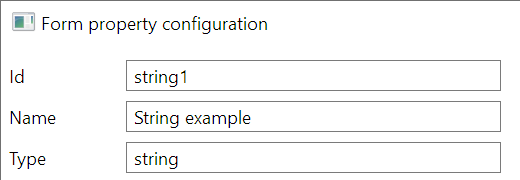
The Form property configuration window appears.
- In the Form property configuration window, enter the Id, the Name and the Type of the form. We are using string1, String example and string in this example.
- Click OK.
The form properties are added to the task and the Required, Readable and Writable properties are set to their default values:
false,trueandtrue, respectively.
To add a form that requires additional configuration:
- Select the user task.
- In the Properties view, select the Form section.
- Click New.
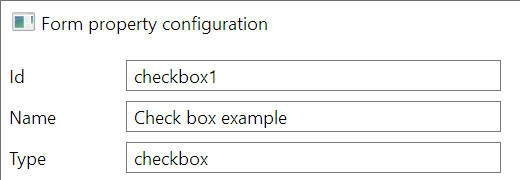
The Form property configuration window appears.
- In the Form property configuration window, enter the Id, the Name and the Type of the form. We are using checkbox1, Check box example and checkbox in this example.
- In the Form values section, click New.

- In the Form value configuration window, enter the Id and Name of the form values. We are using cxb1, First choice and cxb2, Second choice in this example.
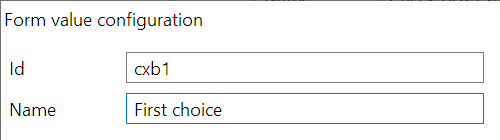
- Click OK.
- Repeat steps 5, 6, and 7 for as many times as necessary.
- In the Form property configuration window, click OK.
The form properties are added to the task and the Required, Readable and Writable properties are set to their default values:
false,trueandtrue, respectively.
Follow the above steps to add more forms to your task and save your work.
Upload the BPMN file to Collibra
- Sign in to Collibra as a user with the Sysadmin global role or a global role that has at least the Workflow Administration global permission.
-
On the main menu, click
 , and then click
 Settings.
The Collibra settings page opens. - Click Workflows.
The Workflows settings page appears on the Definitions tab page. - Click
 Upload a file and locate the BPMN file you have just created inside the Eclipse workspace folder.
With the BPMN file selected in Eclipse, select Navigate → Show In → System Explorer. An explorer window will open, showing the exact file location. You can now drag and drop the file to the Upload a file section in your browser.
An Activity Queue window displays the upload progress.
Once the file is uploaded, you see your workflow in the Workflows Definitions table.
For more details, see the Deploy a workflow section of the Collibra Data Intelligence Cloud Administration Guide.
Configure and enable the workflow
When you upload workflows to Collibra, they are automatically deployed but not enabled. Workflows most likely require additional configuration.
The following configuration allows you to start the workflow from a community page.
To configure your workflow:
- Sign in to Collibra as a user with the Sysadmin global role or a global role that has at least the Workflow Administration global permission.
-
On the main menu, click , and then click
Settings.
The Collibra settings page opens. - In the tab pane, click Workflows → Definitions.
- Click the name of the workflow.
- In the Applies To section, click the edit icon
 .
. - Select Community from the drop-down menu and click Save.
- To confirm the change, click Yes in the dialog box.
The current workflow status is Disabled. To enable the workflow, click the ![]() icon in the title bar, in the upper-right part of the page.
icon in the title bar, in the upper-right part of the page.

Start the workflow
Workflows may be configured to be available in different sections of the Collibra Data Intelligence Cloud or to different roles but in this example, we have configured the workflow so that you may start it from a community page.
Navigate to any community page. We have selected the out of the box Business Analysts Communityin this example.
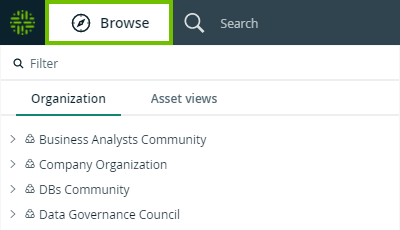
Depending on the level of customization of your Collibra environment, the logo and the available communities might differ.
To start the workflow, click the button with the workflow name in the title bar, under the name of the community.
A notification indicates the workflow has started.
You see the green task bar appear under the title bar with the values defined previously for title and additional text.
To see the task dialog box, click View task a the right of the task bar.

To complete the workflow, click Submit on the dialog box.

The workflow ends, and the task form and task bar closes.
If you would like to start the workflow again, press the button with the workflow name in the title bar.
For additional details, see the Enable or disable a workflow section of the Collibra Data Intelligence Cloud Administration Guide and the Using workflows section of the Collibra User Guide.
Troubleshooting
Upload errors
In case of errors, the workflow does not upload, and an error message is displayed.

The logs contain more information about the error:
- Open Collibra Console.
Collibra Console opens with the Infrastructure page. - Click the name of the environment you deployed the workflow in to display its details.
- Select Data Governance Center.
- Select Logs → dgc.log
Look for errors related to the workflow upload.

Next steps
You have added forms to a user task, and saw how they appear in Collibra.
The next tutorial will show you how to control the workflow by using exclusive gateways.
Additional resources
- Read the Getting started with workflowsCollibra Administration Guide section.
- Read the Form property typesCollibra Administration Guide section.
- Read the Using workflowsCollibra User Guide section.
- Consult the Flowable user guide.