Create a workflow to change asset responsibilities
In this tutorial, you will learn how to create a workflow that allows users to automatically change their responsibility on an asset.
Prerequisitess
- Eclipse IDE.
- Flowable Eclipse Designer plugin.
- Access to a Collibra environment as a user with the Sysadmin global role or a global role that has at least the Workflow Administration global permission.
- Access to the Collibra Console for troubleshooting.
For more installation details and to get familiar with the Eclipse IDE interface, see Getting Started with workflows.
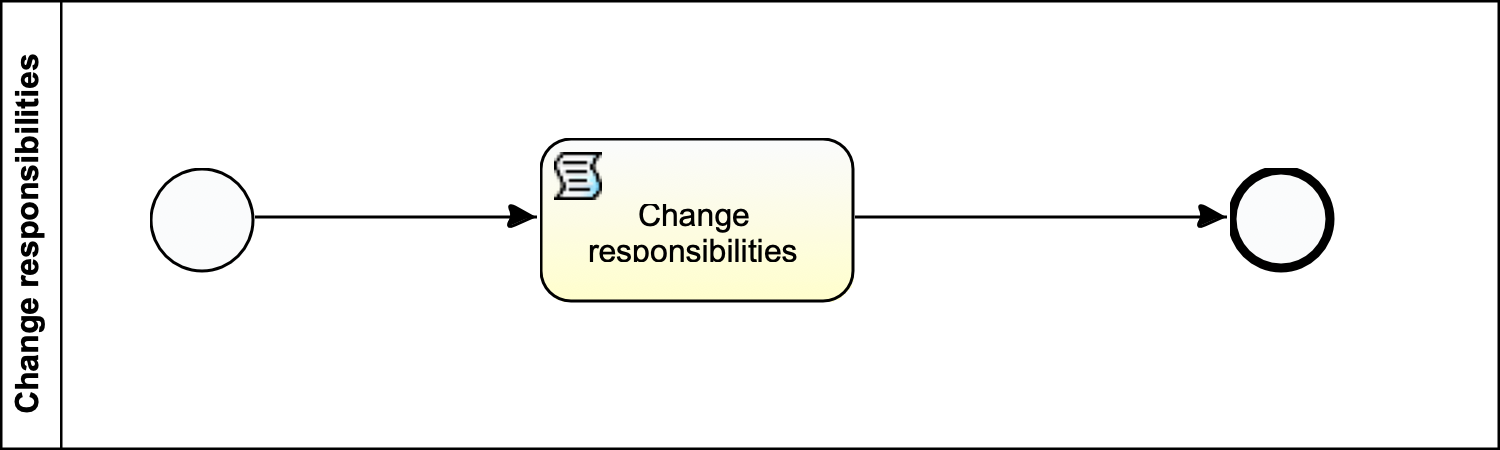
Example workflow
To get started, use the example Change Responsibilities workflow. This workflow changes the responsibility of the current user from a source role to a target role.
The start event form has two string process variables that represent the Universally Unique Identifiers (UUIDs) of the source and target roles. Their default value is 0 and must be configured on the workflow definition page in Collibra.
The Groovy script task performs the following operations:
- Collects the required UUID for the userID, sourceRoleID, and targetRole ID.
UUID userId = userApi.getUserByUsername(startUser).getId(); UUID sourceRoleUuid = string2Uuid(execution.getVariable("sourceRoleId")); UUID targetRoleUuid = string2Uuid(execution.getVariable("targetRoleId")); - Assigns the target responsibility to the current user.
AddResponsibilityRequest targetRequest = AddResponsibilityRequest.builder().resourceId(item.id).resourceType(item.getType()).ownerId(userId).roleId(targetRoleUuid).build();responsibilityApi.addResponsibility(targetRequest); - Assigns the target responsibility to the current user.
FindResponsibilitiesRequest findSource = FindResponsibilitiesRequest.builder().resourceIds([item.id]).ownerIds([userId]).roleIds([sourceRoleUuid]).build();
Responsibility[] responsibilities = responsibilityApi.findResponsibilities(findSource).getResults();

if (responsibilities.length == 1) {
	responsibilityApi.removeResponsibility(responsibilities[0].getId());
}
else {
	loggerApi.info("Multiple responsibilities found");
}Diagram process properties
Deploy the workflow
- Sign in to Collibra as a user with the Sysadmin global role or a global role that has at least the Workflow Administration global permission.
-
On the main menu, click
 , and then click
 Settings.
The Collibra settings page opens. - Click Workflows.
The Workflows settings page appears on the Definitions tab page. - Click
 Upload a file and locate the BPMN file you have just created inside the Eclipse workspace folder.
With the BPMN file selected in Eclipse, select Navigate → Show In → System Explorer. An explorer window will open, showing the exact file location. You can now drag and drop the file to the Upload a file section in your browser.
An Activity Queue window displays the upload progress.
Once the file is uploaded, you see your workflow in the Workflows Definitions table.
For more details, see the Deploy a workflow section of the Collibra Data Intelligence Cloud Administration Guide.
Configure and enable the workflow
You must configure the workflow in Collibra so it is available only on asset pages and only to users who have a specific source role for that asset.
-
On the main menu, click , and then click
Settings.
The Collibra settings page opens. - In the tab pane, click Workflows → Definitions.
- Select your workflow.
- On the workflow definition settings page, configure the following options:
- In the Applies To section, select Asset.
- In the Variables section, provide values for the source role ID and the target role ID.
- In the Roles section, under Start workflow, select the desired role.
- Select Asset from the drop-down menu and click Save.
- To confirm the change, click Yes in the dialog box.
The current workflow status is Disabled. To enable the workflow, click the ![]() icon in the title bar, in the upper-right part of the page.
icon in the title bar, in the upper-right part of the page.

Testing
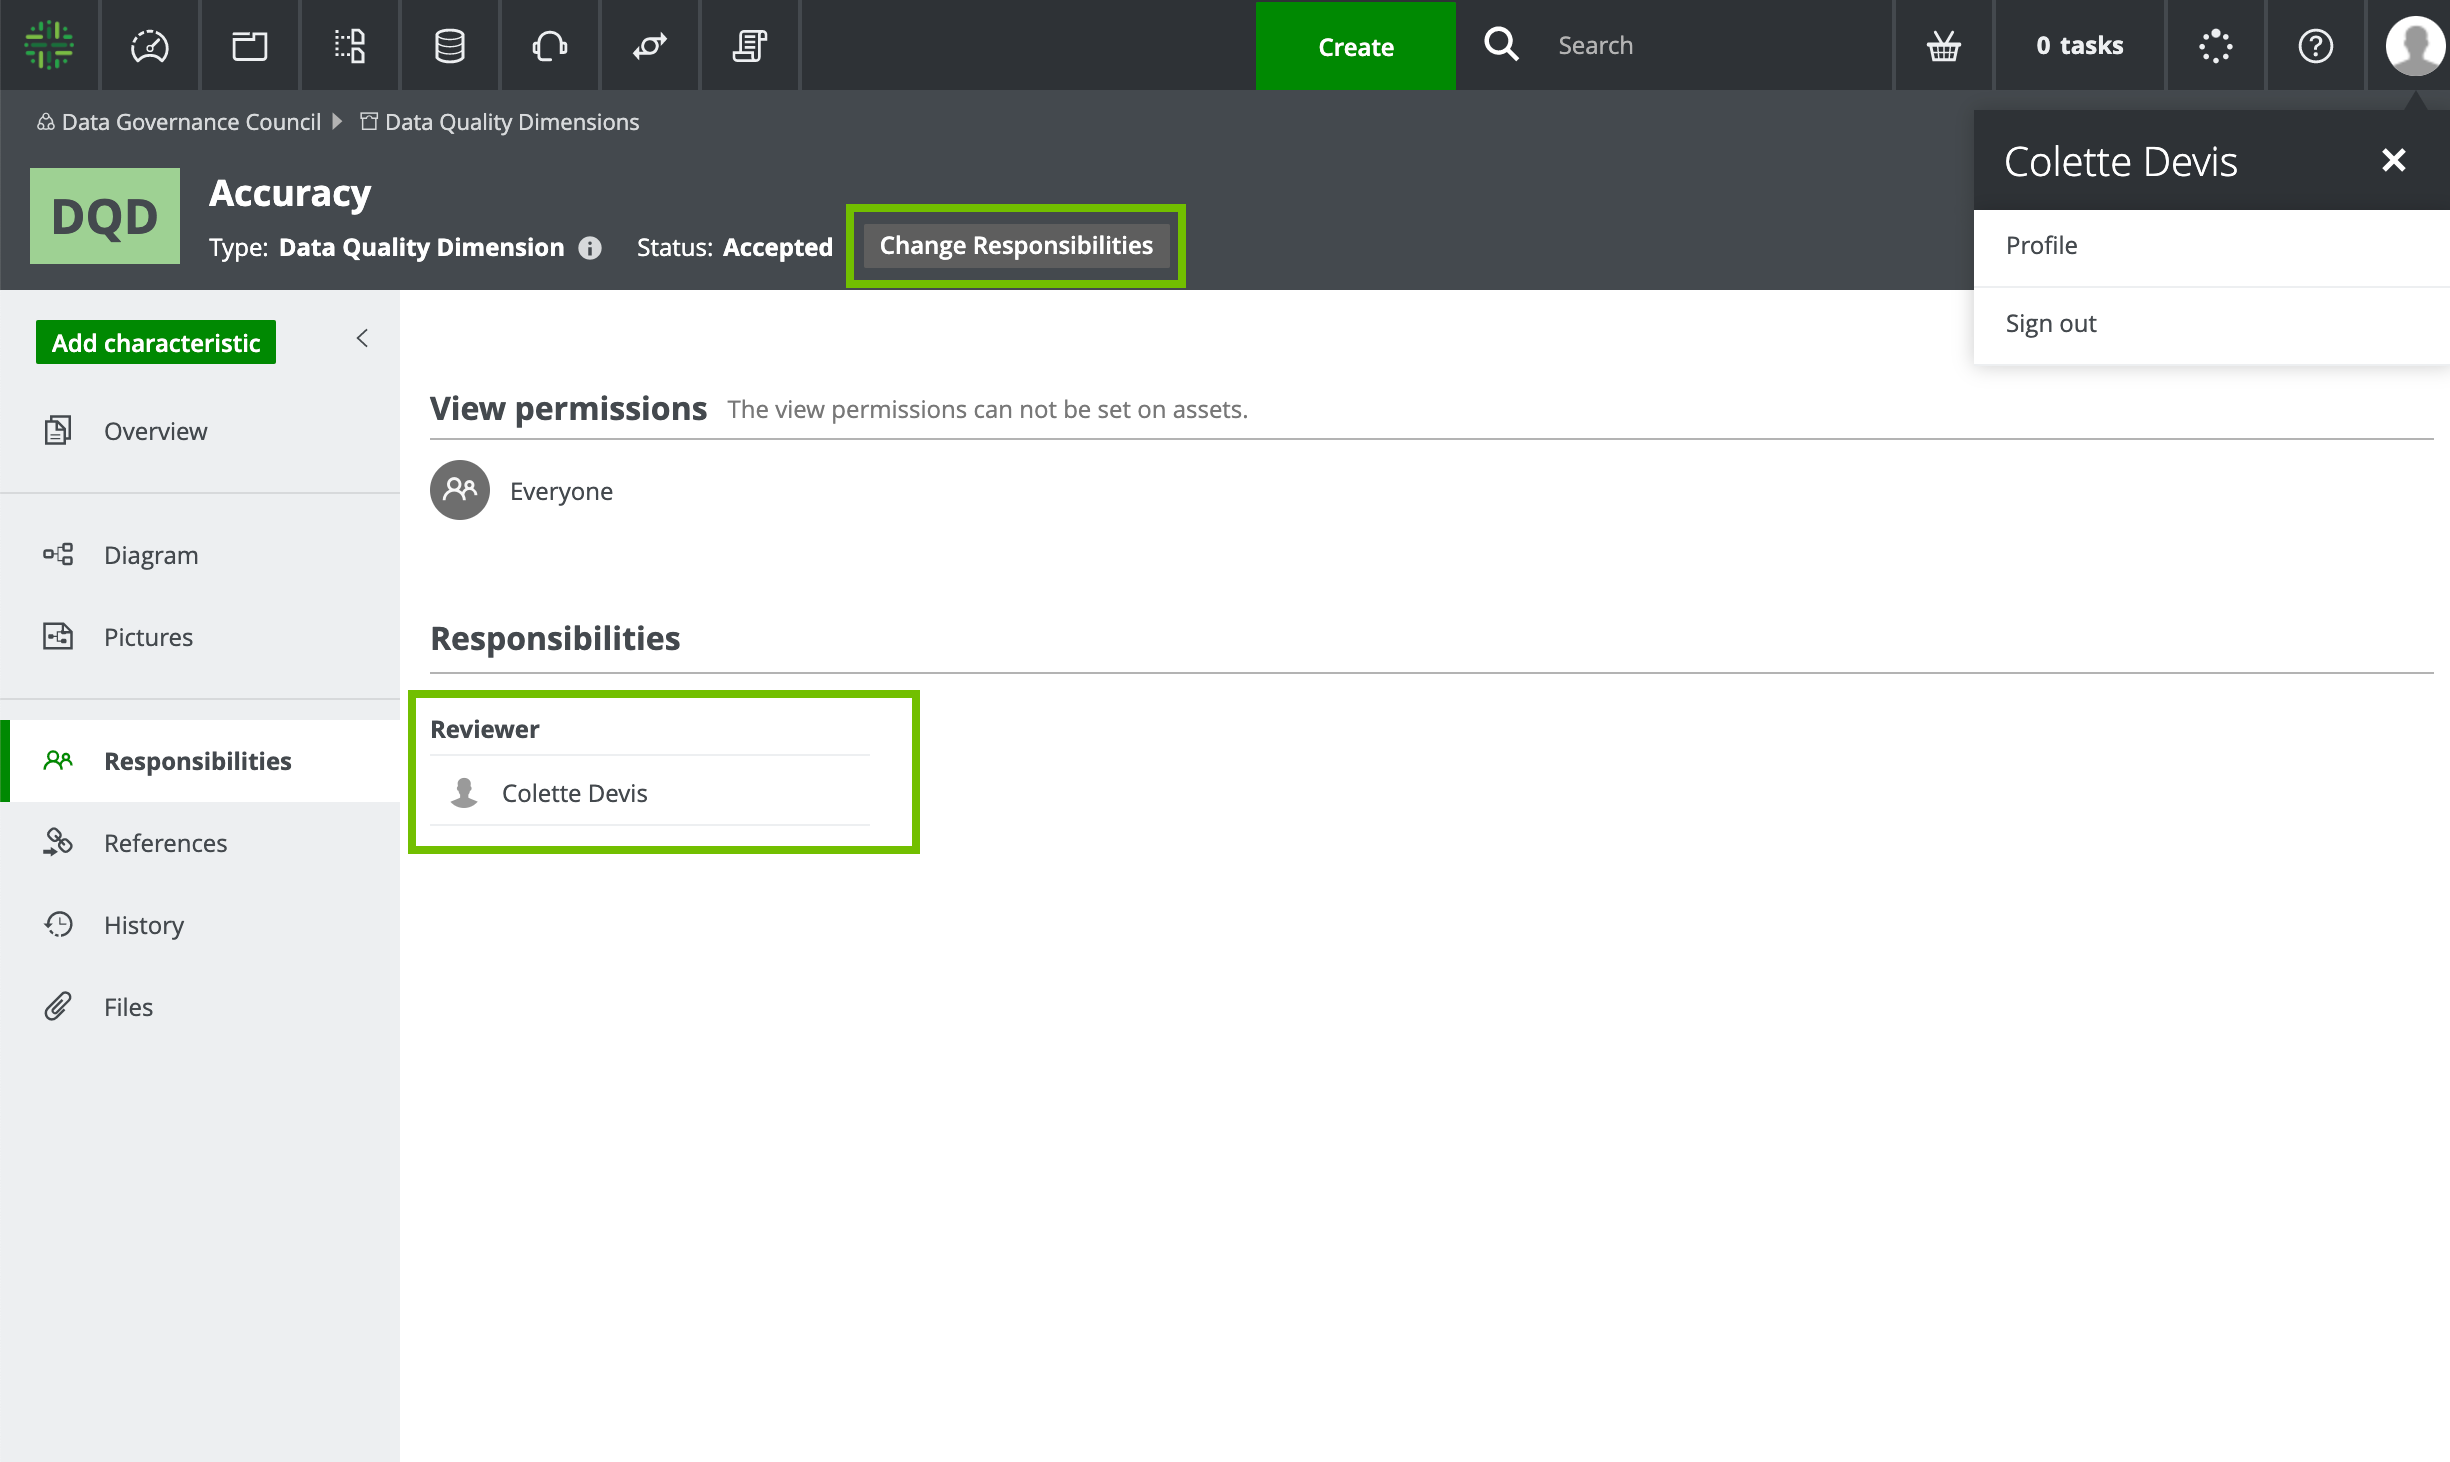
To test this workflow, sing in to Collibra as a user with the source role that you configured in the workflow.
In this example, Colette is assigned the Reviewer role on the Accuracy asset. Because Reviewer is the role configured in the example workflow, Colette can see the Change Responsibilities workflow button in the toolbar.
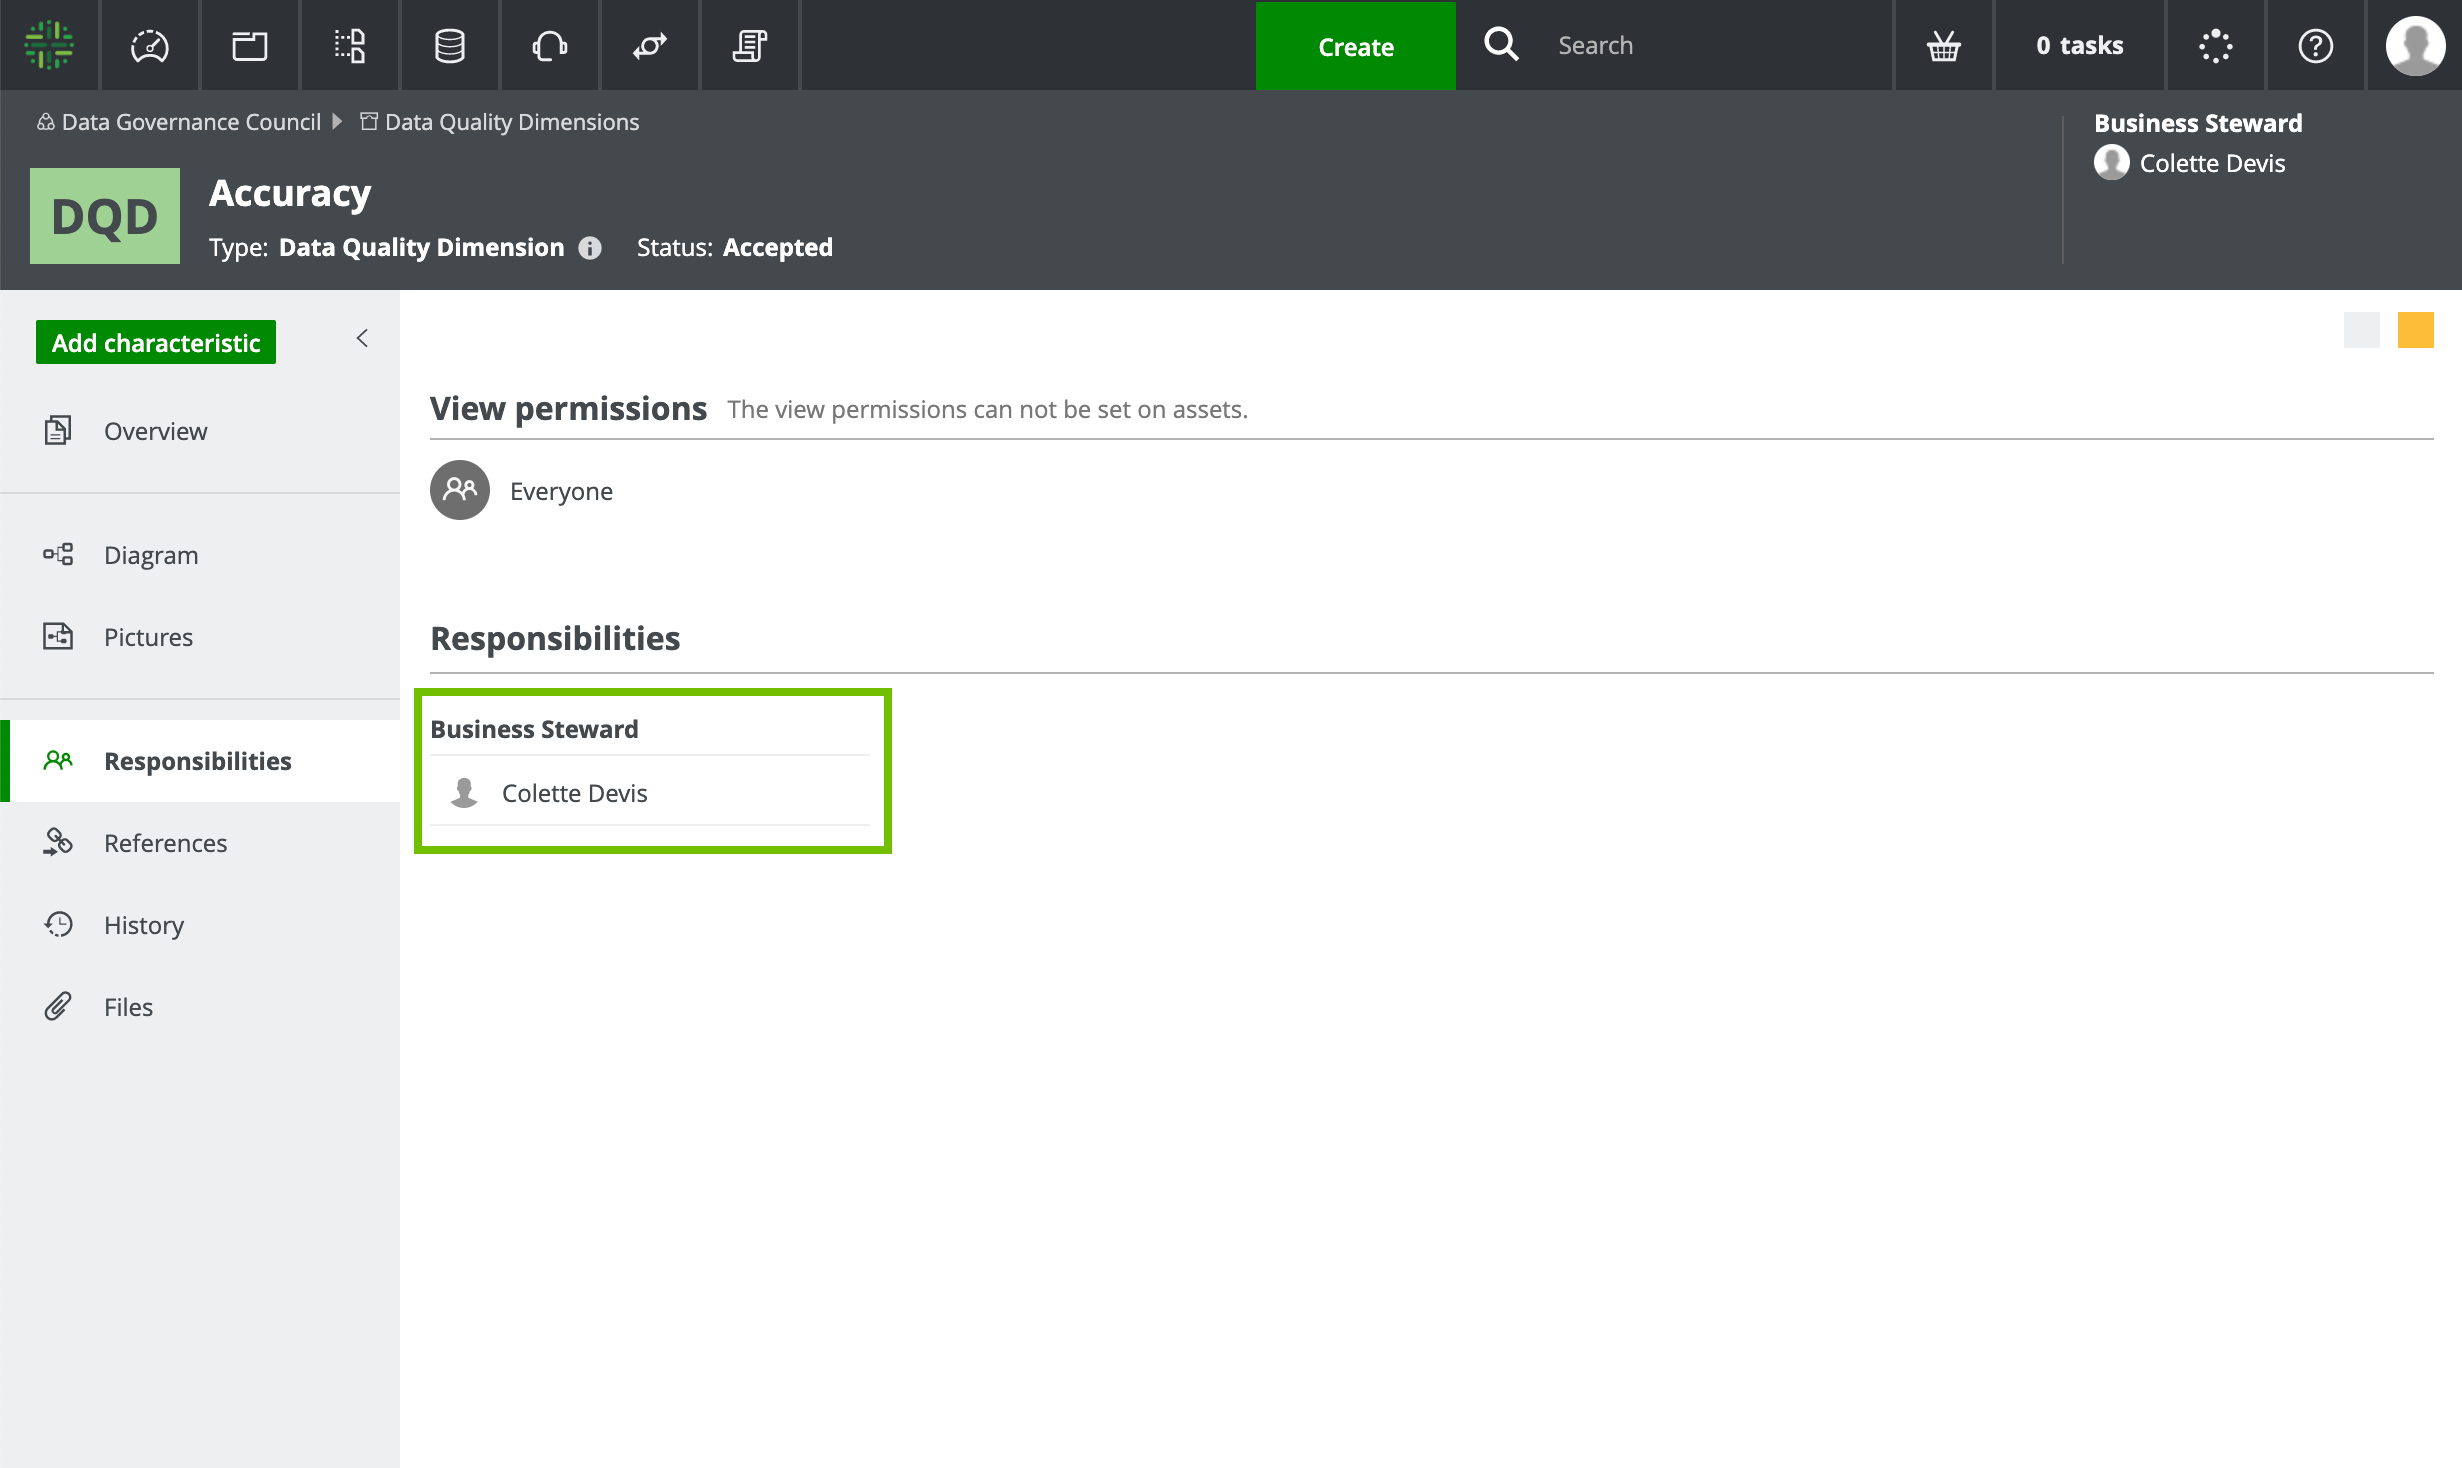
After Colette clicks the Change Responsibilities workflow button, her role changes to Business Steward, which is configured as the target role, and the workflow is no longer available to her.
Troubleshooting
In case of errors, you can view the logs for more information about the error:
- Open Collibra Console.
Collibra Console opens with the Infrastructure page. - Click the name of the environment you deployed the workflow in to display its details.
- Select Data Governance Center.
- Select Logs → dgc.log
Look for errors related to Flowable, Java, or Groovy.
Additional resources
- Read the Getting started with workflows Collibra Administration Guide section.
- Read the Using workflows Collibra User Guide section.
- Consult the Java API documentation: https://<your_collibra_platform_url>/docs/javav2/index.html.